Extension Spring Design Technical Information
Extension Spring Design
Definition of Extension Spring:
Extension springs, also known as a tension spring, are helical wound coils, wrapped tightly together to create tension. Extension springs usually have hooks, loops, or end coils that are pulled out and formed from each end of the body. The function of an extension spring is to provide extended force when the spring is pulled apart from its original length.
Applications:
Extension springs are used in trampolines, push and pull levers, rocking horses, screen doors, and anywhere else extended force is necessary. You can find small extension springs, micro extension springs, large extension springs and heavy duty extension springs. Extension springs can also be used as belts (Garter Springs, Snakes, and Drain Cleaners). Snakes are extension springs without hooks. On snakes the coils are tightly wound together to give initial tension, and its long length allows it to make its way through the maze of the pipe it is unclogging.
The snake or extension spring is turned clockwise so that it acts like a screw threading itself into the clog. Once the snake is imbedded into the mass it works at tearing it apart, thus unclogging the drain. A Garter Spring is also a tension spring that is tightly wound, however one end is usually cone shaped so as to permit it to thread into the other end of the garter spring making the entire spring into a spring belt or ring. The belt or ring can now be used like a rubber belt or pulley, but with more give and flexibility. They can also work their way around many pulleys like a serpentine belt and take on many shapes.


Example:
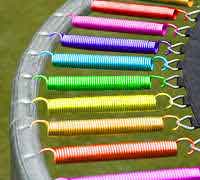
A trampoline uses many extension springs to create the bouncing effect. Every time someone jumps on the trampoline, the extension springs are pulled apart and force is exerted. This makes the extension spring want to go back to its original length, thus giving the inertia to fly into the air.
Design Calculations
1. Force: How much force do I need to generate?
This question is more easily answered by thinking in terms of rate, which is pounds per inch (lbs/in) of extension or (distance traveled when pulled). All extension springs have a rate of pounds per inch of extension.
Example: Lets say your spring is 10 inches long and has a rate of 10 lbs per inch / of extension . This means if you pull the spring 1 inch in distance it will take you 10 lbs of force to do so. The concept is simple, for every 1 inch of distance you pull or travel it will take you 10 lbs of force to do so. The key here is to figure out how much distance of travel the extension spring needs in order to function correctly, as well as give you the correct amount of force when the spring has traveled it's length. Lets assume you need 5 inches of travel, then the force your spring will generate is 50 lbs when extended 5 inches. Remember, the key here is for you to figure out how much force you need your spring to have at a certain amount of distance traveled.
2. What is pre-load and do I need it?
Pre-load is stretching the extension spring a short distance from its free state, so one could have stored energy.
Example: Your extension spring will not give you any force until you stretch it. So, one must pull (pre-load) the spring to place the hooks of the extension spring on to your product. In the example of a trampoline one must pull the extension spring a short distance so you can have a tight rubber mat to jump on. Without pre-loading the extension spring, your rubber mat would not be nice and snug to jump on. There are two aspects here that go hand in hand one is rate and two is initial tension. The Spring Rate (lbs/in) plus the distance traveled will give you the final force of your spring. But one has to take into consideration the initial tension.
Initial tension is the tension between the coils sandwiched together. Every extension spring has initial tension. Lets say your spring has a rate of 10lbs/in plus your initial tension is 2 lbs.
This means that you'll get 2 lbs of initial tension force when you just barely pull the extension spring enough to see light between the coils. So the way to figure out your total force is initial tension + rate (lbs/in of extension) of spring. This will give you the total amount of force your spring will give you for the amount of distance you will travel. Using the above example, if your spring is going to travel 5 inches of distance that will give you 50 lbs of force plus 2 lbs of initial tension giving you a total of 52 lbs of force.

3. Determine Spring Constant
Formula for Spring Constant
Rf = Gd^4 / 8D^3NS = 2.55 PD / d^3 (Correct for D/d)
G = psi * 10^6
- G = Shear Modulus of Torsion
- d = Wire size
- D = Mean Diameter
- N = Number of active coils
- Rf = Rate of extension spring (in lbs./inch)
- S = Stress (lbs. /Sq. Inch)
- P = Load (lbs)
- M = Moment (inch-lbs.)
- D / d = Index correction (developed from Wahl Factor)
4. Determine Initial Tension
Formula for Initial Tension
P = Sd^3 / 2.55D = Load in lbs- d = Wire size
- D = Mean Diameter
- N = Number of active coils
- Rf = Rate of extension spring (in lbs./inch)
- S = Stress (lbs. /Sq. Inch)
- P = Load (lbs)
- M = Moment (inch-lbs.)
- D / d = Index correction (developed from Wahl Factor)
The Spring Force Chart
Use this chart to adjust your spring force accordingly
More Force (MF)
| Smaller OD = MF |
| Less Coils = MF |
| Thicker Wire = MF |
| More Travel = MF |
Less Force (LF)
| Larger OD = LF |
| More Coils = LF |
| Thinner Wire = LF |
| Less Travel = LF |
Key Parameters:
1. Number of Coils:
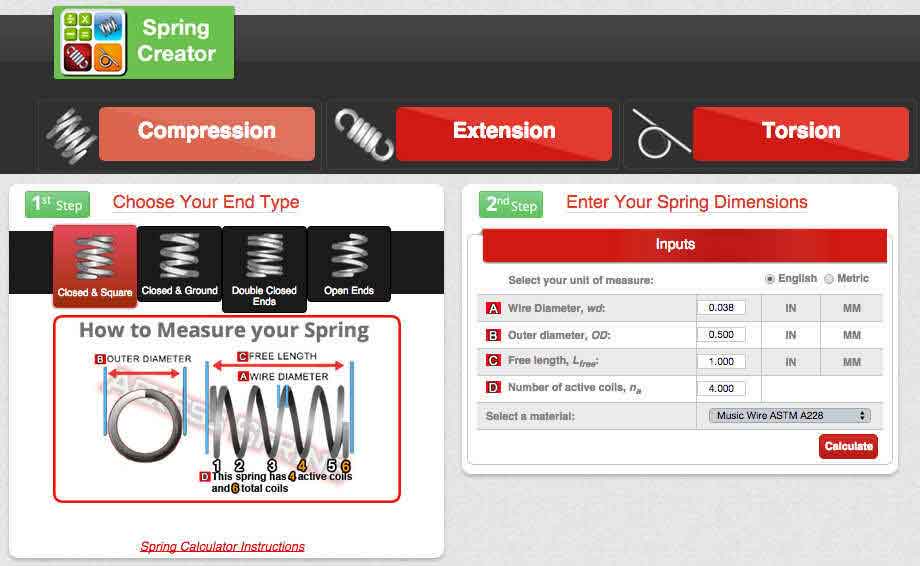
Remember the chart above: Smaller OD = more force (MF), Larger OD = Less force (LF). The same is true with the number of coils in your extension spring. Less coils = A stronger extension spring, more coils = weaker extension spring. At the same time less coils = more stress and fatigue, more coils = less stress and fatigue. The perfect balance on your extension spring design is one that combines the right amount of coils for how much distance or travel you want to achieve along with the correct amount of force needed to do the job. If you need help measuring the number of active coils you can watch our how to measure an extension spring video.
2. Hook Configuration.
Crossover Center Hooks

Extended Hooks

Machine Hooks

No hooks

Side hooks

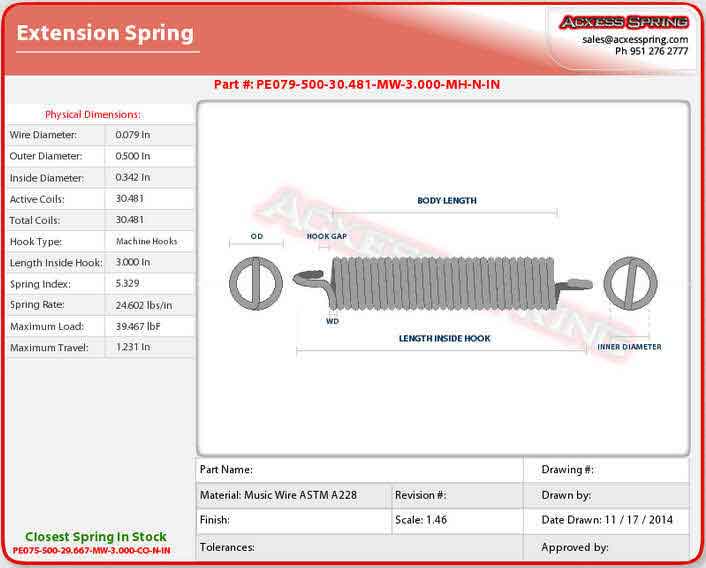
Most extension springs have hooks which transmit the force to your product. From a economic manufacturing point of view, you as a designer or engineer should avoid having extended or long length hooks especially with small springs. This ensures that your end extension spring design will be economical as well as functional. Many designers/engineer never take this into account, causing them to end up with complicated hook configurations that are overkill. Please do not limit yourself either. You should consult the advice of a professional spring design engineer to asses your design criteria while your still in the prototype stage. They can point out great ways to assemble your extension spring to your product with very simple hooks. A lot of times the extension spring designs are very complex and cannot be manufactured. Remember a great spring is all in the design, including all the above factors we took into account to get here. Sometimes less is more. There are many different types of hooks that can be added to your extension spring. Extension springs can have machine hooks coming right off the body, side hooks, loops, cross-over hooks and double loops, as well as many more end configurations. Just about any kind of end configuration can be manufactured into your extension spring.
General Step By Step For Designing An Extension Spring:
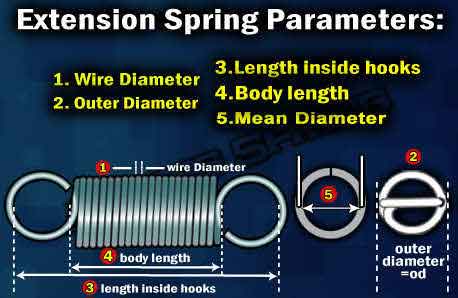
- 1. Determine if the extension spring has to fit over a shaft. This would indicate that the inner diameter of the spring must at least be a certain diameter
- 2. Determine if the spring is going to fit in a hole. This would indicate that the outer diameter of the spring can be no larger than a certain size.
- 3. Does the extension spring need to fit into a fixed space. This would indicate that the Length Inside Hooks and the Body Length either has to be at least a certain length or can be no longer than a certain length.
- 4. What is the purpose of the extension spring. This will allow the engineer to know how much initial tension is needed and how much force the spring will need to have in order to perform its desired function.
- 5. What types of hook do you need? Do the hooks need to have a certain gap between the end of the hook and the body of the spring for a rod of shaft to slide into?
- 6. Determine what type of material will be necessary for this spring to function correctly. For example stainless steel is ideal for medical applications and salt water.
- 7. Consult a spring engineer you trust to help you achieve all of the steps above including designing your spring as economical and efficient as possible.
For more helpful extension spring tips visit: planetspring.com


 English
